Tuesday, November 30, 2010

Chocolate Pistachio Fudge


So I've chosen my Christmas Baking Lineup:  Rum Balls, Gingerbread Cookies, Candied Orange Peel, and Christmas Cake (a delicious fruit cake - yes, fruitcake can be delicious!).  The fruitcake is done and has been put away to ripen until Christmas.  With the exception of the candied orange peel, I've made all the others in years past.  Rum Balls and Candied Orange Peel were always part of my Grandmother's Christmas goodies repertoire, so this year--in honor of her--I'm adding the orange peel to mine.  I plan to add a twist though:  dipping the ends in dark chocolate.

What does this have to do with pistachio fudge you ask?  Well, I made a batch for a recent girls' night and thought you might want to add this recipe to your holiday treat list.  You know, in case you need another treat.  I can't overemphasize how good--and rich--it is.  Moreover, it's extremely quick and easy to put together and looks beautiful. It would make a perfect gift candy, too.  Important! You want to serve this fudge very cold.  In fact you can store it in the freezer and serve it directly from there.


I'd like to give a shout out to my Polish friend Sylwia who gifted me with the can of sweetened condensed milk used to make the fudge. As I said in my last post, it's impossible to find this item in my town.  Sylwia, brilliant woman that she is, brings a supply back to Denmark each time she visits Poland.  Dziekuje, Sylwia.


Pistachio Fudge
Adapted From Nigella Express by Nigella Lawson

12oz. semisweet chocolate, chopped (I used 74%)
1 14oz. can condensed milk (I used sweetened condensed milk)
pinch of salt
1c shelled pistachios
2T butter

1.  Melt the chopped chocolate, condensed milk, butter and salt in a heavy-bottomed pan on low heat.

2.  Put the nuts into a freezer bag and bash them with a rolling pin until broken up into both big and little pieces.

3.  Add the nuts to the melted chocolate and condensed milk and stir well to mix.

4.  Pour this mixture into a 9-inch square aluminum foil pan, smoothing the top. (I used a regular 9-inch non-stick baking pan lined with aluminum foil.)

5.  Let the fudge cool and then refrigerate until set.  (I put mine in the freezer for 20 minutes to harden even more before cutting.)  Cut into small pieces approximately 1 3/4 by 1 3/4 inches in size.  Cutting 7x7 lines in the pan to give 64 pieces best achieves this.

6.  Once cut, you can keep it in the freezer, no need to thaw; just eat right away.

Tuesday, November 23, 2010

Pea Puree Lasagnette


Dear Denmark, you've done it to me again.  How many times have I gotten excited about a certain recipe, dashed to the grocery store, ingredient list in hand, only to drive home with hopes dashed because I couldn't find that *one* ingredient?  Apparently it has something to do with my little corner of the country because in talking to a group of girlfriends who live 90 kilometers away, they easily can find sweetened condensed milk in their grocery stores.  I bet the same goes for ricotta, too.  The injustice!

Luckily, there's a happy ending to this story.  The ingredient for which I was on a treasure hunt was ricotta cheese.  Instead I substituted cottage cheese and ran it through the food processor for 30 or so seconds to break up the little pieces.  No, it's not the same taste--or texture for that matter--as ricotta and Yes, I would have preferred ricotta, but mixed together with the pea puree it worked beautifully.

I picked up this delightful recipe from Poor Girl Gourmet: eat in style on a bare bones budget, one of the hottest cookbooks of 2010.  The book is all about eating well, very well, and saving money in the process.  The world could use more books like this.

Author Amy McCoy calls it Pea Puree Lasagnette because what you make is not a full tray of lasagna but fewer pieces of lasagna noodles with a delicate pea sauce between each layer.  While I like peas I don't love them and was a bit of a skeptic about the dish.  However, I enjoyed making it and, even better, it was absolutely delicious.  The shallots in the pea puree give it tons of flavor as does the conservative amount of crispy, crumbly bacon on top.

Another helpful feature of Poor Girl Gourmet is that each recipe comes with a cost estimate.  For instance, the Pea Puree Lasagnette is estimated to cost $8.98 for four (and there is a break down of each recipe component with price to show you how McCoy arrived at the total).

Pea Puree Lasagnette
From Poor Girl Gourmet by Amy McCoy

1c plus 2 1/3c frozen peas
1 medium shallot, finely chopped, divided
1t dried thyme, or 3t fresh, divided
1c fresh ricotta
Kosher salt
Freshly ground black pepper
6 wide lasagna noodles
2T plus 3T extra virgin olive oil
2T unsalted butter, cut into pieces
2T grated Pecorino Romano cheese
4 slices bacon, cooked to desired doneness and crumbled
1/4c (4T) créme fraiche or sour cream

My notes:  I used cottage cheese instead of ricotta, sea salt instead of Kosher, salted butter, Parmesan, and plain Greek yogurt instead of sour cream.  Also, I used 8 lasagna noodles, and cooked the dish in a 9 by 13-inch baking pan.

1.  Preheat oven to 350F.  To make the pea puree, cook 1c of the peas, half of the shallot, and half of the thyme in 1/4c water in a small saucepan over medium heat until heated through, 3-5 minutes.  Remove from heat and set aside to cool slightly, 5 to 7 minutes.

2.  Once the pea mixture has cooled, add it, liquid and all, to a blender or food processor and puree.

3.  Transfer the puree to a medium bowl and add the ricotta.  Mix well, until you have a pale green blend.  Add salt and pepper to taste.  Set aside.  The puree may be made a day in advance and refrigerated in an airtight container if you so desire.

4.  In a large pot of boiling, salted water, cook the lasagna noodles according to the manufacturer's directions until al dente.  Rinse well with cold water to prevent the noodles from sticking to one another or to themselves. Set aside.

5.  Grease a 10 by 15-inch rimmed baking sheet with 2T olive oil to prevent pasta from sticking.  Lay two sheets of pasta on the bottom of the pan the long way.  Spread one-quarter of the pea puree on each. Cover each with another sheet of lasagna and spread the remaining pea puree evenly on both.  Top with a third layer of pasta and evenly distribute 1T of the butter pieces along the top noodle of each lasagnette stack.  Sprinkle with 1T of cheese over each stack, season with salt and pepper, and bake 25-30 minutes until lightly browned.  Remove and let stand for 5 minutes before cutting.

6.  While the lasagnette cooks, cook the remaining peas, for they will grace the top of the lasagnette when all is completed.  Heat the remaining 3T olive oil in a small saucepan over medium heat.  Add the remaining half of the shallot and cook until translucent, 2 to 3 minutes. Add the peas and the remaining thyme, and cook until the peas are heated through, 5 to 7 minutes.  Keep the topping peas warm until the lasagnette is ready to serve.

7.  Top each lasagnette with one-quarter of the pea mixture.  Sprinkle crumbled bacon onto each plate and top with sour cream.

Wednesday, November 17, 2010

Buckwheat Fig Scones


I am approaching Good to the Grain: Baking with Whole-Grain Flours like an unforgettable novel.  Each page is taken in and savored, parts are read over and over again, and one just doesn't want it to end.  In my humble opinion, author Kim Boyce has written one of the most fascinating and informative baking books of all time.  What's more, the photography is stunning in a humble and rustic way.

I've been skipping around a bit and letting things jump out at me, like the quinoa porridge and the graham nuts (a homemade version of Grape-Nuts).  But nothing grabbed my attention more than the buckwheat fig scones.  I love buckwheat, but until four or five years ago I wasn't all that familiar with it.  Then I married a French man with a fondness for galettes, savory crepes made with buckwheat flour.  My world gradually opened up; now, on lazy weekend mornings, we often make American-style pancakes with a mixture of buckwheat and all-purpose flours.

Will you hate me if I tell you that the recipe is somewhat labor intensive?  Well, I assure you that you simply won't care once you bite into one of these delectable scones.  Trust me.  There are two parts to the recipe: the fig butter and the actual scones, but the beauty is that you can divide the work over the course of days, if you wish.  And I was first in line for that train.


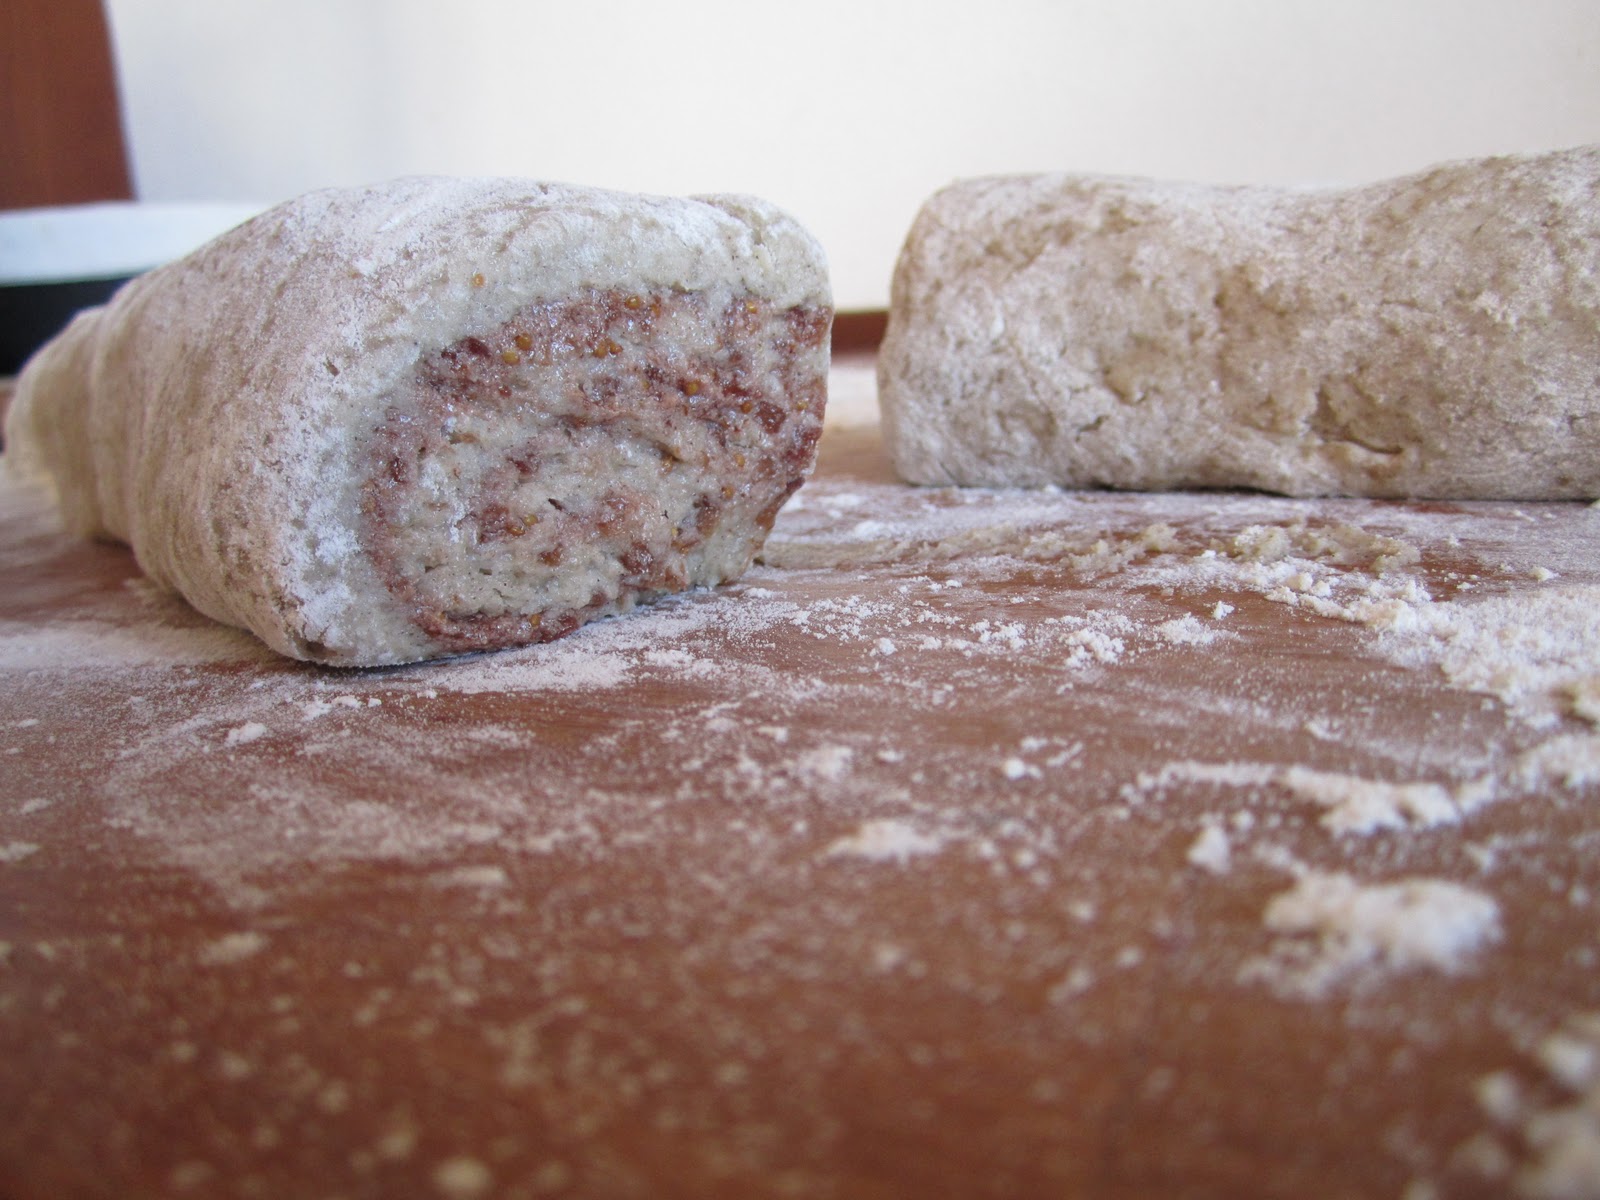
One day I made the fig butter; the following day I prepared the scone dough, applied the fig butter, rolled it into a log (cinnamon roll-style), sliced it in two and set it in the refrigerator where it sat for two days. The recipe says to chill for a minimum of 30 minutes to a maximum of two days. I can tell you that assembling the recipe this way made it a whole lot easier than doing everything in one day, although it's completely realistic to tackle it that way, too.

In Denmark right now the markets are full of gorgeous dried fruit, just in time for the holidays.  Namely, dates and figs.  I must admit, I was (and am) completely absorbed by the idea of fig butter. Compared to apple butter, which I like but can also border on banal, fig butter is exotic.  Kim's recipe makes enough for the scones as well as a good sized jar to use on toast or whatever else one fancies.  It's rich and a little goes a long way, but oh my goodness is it delicious.  I can almost guarantee you've never tasted anything like it.  (With the holidays coming up, it would make a superb gift!)

Enjoy the scones warm or at room temperature.  We ate them warm at breakfast and as a snack later in the afternoon.  Divine.

Fig Butter
Recipe (with directions I've truncated slightly) from Good to the Grain: Baking with Whole-Grain Flours

1/2c sugar
2 whole cloves
1 star anise
1c red wine
1/2c port (I used Marsala)
12oz. dried Black Mission figs, stems removed (while the package didn't say Black Mission, the figs I bought worked perfectly)
1/4t cinnamon
4oz. (1 stick) unsalted butter; softened

1.  Place the sugar and 1/4c water in a small heavy-bottomed saucepan.  Stir the mixture together with a wooden spoon, incorporating the sugar without splashing it up the sides.  Add the cloves and star anise.

2.  Bring the mixture to a boil over medium heat and cook 7-10 minutes, until the syrup is amber-colored.

3.  Add the red wine, port, figs, and cinnamon, standing back a bit, as the syrup is hot.  Don't panic when the syrup hardens; this is the normal reaction when liquids are added to hot sugar.  Continue cooking the mixture over medium heat for 2 minutes, until the sugar and wine blend.

4.  Reduce the flame to low and simmer for 30 minutes, stirring occasionally.  The mixture is ready when the wine has reduced by half.  Remove the pan from the stove and cool to room temperature.

5.  Fish out the star anise and cloves.  Pour the cooled figs, with their liquid, into a food processor and purée until smooth, about 1 minute.  Add the softened butter to the fig paste and process until smooth.  The fig butter can be spread right onto the buckwheat scone dough or stored in the refrigerator for up to 1 month.  If it is refrigerated, bring it to room temperature before using.

Buckwheat Fig Scones
From Good to the Grain:  Baking with Whole-Grain Flours

Dry Mix:
1c buckwheat flour
11/4c all-purpose flour
1/2c sugar
2t baking powder
1/2t kosher salt (I used table salt)

Wet Mix:
4oz. (1 stick) cold unsalted butter, cut into 1/4-inch pieces
11/4c heavy cream (for those in Europe, I used 18%, not 38%, to great success)

1c Fig Butter

1.  Sift the dry ingredients into a large bowl, pouring back into the bowl any bits of grain or other ingredients that may remain in the sifter.

2.  Add the butter to the dry mixture.  Rub the butter between your fingers, breaking it into smaller bits.  Continue rubbing until the butter is coarsely ground and feels like grains of rice.  The faster you do this, the more the butter will stay solid, which is important for the success of the recipe.

3.  Add the cream and gently mix it into the flour with a spatula until the dough is just combined.

4.  Use a pastry scraper or a spatula to transfer the dough onto a well-floured surface.  It will be sticky, so flour your hands and pat the dough into a rectangle.  Grab a rolling pin and roll the dough into a rectangle that is 8-inches wide, 16-inches long, and 3/4-inch thick.  Use flour generously to prevent sticking (under the dough, on top of the dough, and on the rolling pin).

5.  Spread the fig butter over the dough.  Roll the long edge of the dough up, patting the dough as you roll so that it forms a neat log 16-inches long.  Roll the finished log so that the seam is on the bottom and the weight of the roll seals the edge.

6.  Use a sharp knife to slice the log in half.  Put the halves on a baking sheet or plate, cover loosely with plastic wrap, and chill in the refrigerator for 30 minutes (or up to 2 days).  While the dough is chilling, preheat the oven to 350F.  Line a baking sheet with parchment paper.

7.  After 30 minutes, take both logs out of the refrigerator and cut each half into 6 equal pieces about 11/4-inches wide.  Place each scone flat, with the spiral of the fig butter facing up, on a baking sheet, 6 to a sheet.  Give the scones a squeeze to shape them into rounds.

8.  Bake for 38-42 minutes, rotating the sheet halfway through.  The scones are ready to come out when their undersides are golden brown. They are best eaten warm from the oven or later that same day.


Thursday, November 11, 2010

French Children's Cookbook

Just look at the cuteness that my father-in-law sent us last week. The book is organized by seasons and features darling illustrations on each page. C'est tres mignon!


Tuesday, November 9, 2010

Coconut Split Pea Dahl

A few days ago I shared my discovery of Nami-Nami, an intriguing food blog written by a talented home cook in Estonia.  Upon perusing her site, the photo (and corresponding recipe) for simple coconut lentil dahl caught my attention.  It was a perfect match for two of my current food goals:  eat more legumes and spend less money on food.  As we all know, beans are an inexpensive super food.  A great source of protein and fiber and a hearty substitute for meat.  I've talked before about Mark Bittman and his quest to get people to eat less meat in favor of legumes, whole grains, vegetables and fruits. We still eat our fair share of meat in this house, but the concept really resonates with me and the benefits are simple:  better health, environmental stewardship, and money saved.

So when I saw the recipe for dahl, it struck my Bittman chord.  Problem was, my lentil supply was depleted.  Instead, I grabbed a bag of dried split peas and decided to go for it.  Like lentils, split peas require no pre-soaking and break down really well when exposed to moisture and heat.

The recipe couldn't be easier--the only hard part was waiting for it to cook down and reduce to a wonderfully creamy consistency.  If you are in search of another simple and hearty dish to add to your mealtime line up, you cannot go wrong with this recipe.  Plus, make the crispy onions for the top and you get an additional level of, uh, excitement.

So, crispy onions.  Pille (the Estonian woman) refers to them as crispy, but many of us also know them as caramelized.  Whatever you call them, I have developed an abiding fondness for this version of one of the best kitchen staples known to man. (This from a woman who detested onions until her early 30s.  But the onion and I--even raw--are becoming better and better friends in recent years).

It's too bad that I'm not very skilled at cooking them.  Despite paying close attention to the amount of oil and level of heat, invariably I end up with a bunch of onions that are caramelized and crispy, yes, but also verging on burned.  The proof is in my rather sad photo.  They still tasted terrific, but can I tell you I woke up in the middle of the night freaking out about all the carcinogens I ingested?  True story.  I told Alan how worried I was, and he said Well, it's not like you eat them every day. That made me feel a little better, but it was still hard to get back to sleep.

At any rate, I urge you to make this delicious dahl--with or without the onions.  Perhaps you are better skilled at achieving the perfectly caramelized onion.  I don't want you waking up in the middle of the night either.  At least not because of burned onions.


Friday, November 5, 2010

Randomness


It's been a productive morning.  Last night I prepared a batch of Bircher muesli, which is easy and incredible the next morning.  All you do is mix a cup of oats with a half cup boiling water, a pinch of salt, and a few squeezes of lemon juice.  Stir and set aside to cool.  Once mixture is cool, top with plastic wrap and leave on the counter overnight.  When you are ready for breakfast the next morning, add 10-12 tablespoons plain (or Greek) yogurt, 1-2 teaspoons of honey, one grated apple, and a handful of toasted nuts.  You are welcome to omit the apple and use any combination of fresh or dried fruits you like.  It's beyond good!

As I sit here eating my lunch of coconut split pea dahl (recipe coming soon),  I can hear a saucepan filled with the makings of fig butter simmering away on the stove.  If all goes smoothly, I will be enjoying fig scones at about this time tomorrow.  I discovered the recipe in Kim Boyce's spectacular book Good to the Grain: Baking with Whole-Grain Flours.  I will most definitely share the recipe.

Finally, resting on my countertop is a large bowl of sponge starter (on day two of three).  I have grand plans to turn it into two loaves of Estonian rye bread.  Why?  Well, I stumbled upon Nami-Nami, an amazing food blog written in English by an Estonian woman named Pille.  Incidentally, nami-nami means yummy in Estonian.  Winding my way around her site, I found an interview she did back in 2007 in which she raves about Estonian rye bread, describing it as a delightful mix of sweet and sour.  I was enchanted but unsuccessful in finding a recipe for the bread on her site.  Fortunately, I discovered another one that looked simple and delicious.  Two of the world's best words, if you ask me.

And yes,  recipe coming soon.  :-)

Wednesday, November 3, 2010

Halloween in Denmark

We were lucky to be invited to our first ever Halloween party in Denmark.  Jakob and Stine are known far and wide for throwing the most exciting annual Halloween bash, complete with food and drinks, costumes, trick-or-treating, and decorations galore.  It's an evening of fun for the grown-ups and kids alike.

Because I'm not very clever when it comes to costume ideas, I went as a witch with matching neon green and black striped tights and hat.  Alan threw on a red wig that was supposed to be a likeness of Donald Trump's coif; instead he fashioned it into something that looked more like a 1970s version of Olympic Gold Medalist Shaun White (with a haircut).  Anatole wanted more than anything to be a ghost, but a nice ghost, which is almost impossible to find in the stores (sure I could have made something, but I didn't).  So we settled instead on a Transformers outfit.

I brought a plate of deviled eggs and added a thin slice of pimento-stuffed green olive on top of each to look like an eyeball (too bad I forgot to take a photo).  The other food--everything from spinach and salmon quiche to hot wings--was terrific, and Stine made two darling cakes, one that looked like a bat and the other a colorful caterpillar.

The highlight of the evening was when we took the kids around to various neighbors' houses to trick-or-treat.  Jakob and Stine's neighbors are wonderful and really get into it with the kids.  They prepare little bags of different treats, such as gummies and licorice pieces.  Some of them even dress up.  In case you are wondering, the kids don't say "Trick-or-Treat," but (and this is a translation) something like "Give me candy or I will scare you!"  It's all very cute.  At one house, the adults were treated to a can of beer!